Showing posts with label butterfly. Show all posts

Tuesday, 4 September 2012

My Birthday Girl!

As many of you have seen already, August is a very big birthday month for me (well for the whole family. I'm sure B is cringing at the thought of that month also). I didn't exactly time it very well with both Miss 11 and Miss 6 being born a day apart, and then in April I have the same issues with Mr M and Master 8 having the same problem but I guess once you reach a certain milestone you're not exactly wanting all the fan fare....yes Mr M I'm talking about you! (He gets a little grumpy in his old age).

With both the girls being so close in birthdays and with five years between them I have been fortunate to be able to get away with just parties for the oldest as being the youngest you don't really know any different! (I can see B rolling her eyes as there is eight years between us!)

Turning six and being at school now has changed all that for my youngest lady and of course the other two had their first "official" birthday party once they had started school. This particular post doesn't exactly have any recipes attached to it. It is more just little ideas that I came across to help decorate my little lady's "ballerina/fairy" themed party and how it looked with all the decorations in place. I found some wonderful online stores that helped make it all look magical on the day.


The tissue paper pom poms I made myself as I am now an expert at making them as I've made quite a few over the last 12 months, for a baby shower and a high tea also. They are very easy and I found a site on Youtube.


Because my Miss 6 wanted Ballerinas and Fairies I added a few butterflies and also handmade these super cute little ballet tutu's on a stick.


The were actually very easy......just some pink card that I came across in a scrap booking place and I drew the outline of a leotard and cut some pink tule and stuck it on with a hot melt glue gun and added a little bow. I then stuck them onto a stick as I was thinking of sticking them into something at the time but ended up putting them on the blinds behind the table.


I made each little fairy/ballerina a flower garland to wear on their head which made them feel special......all I did was purchase some soft garden wire and shaped it into a circle and bought some little bits and pieces like paper flowers, feathers, stars, material flowers and ribbon and stuck them all around the wire with my hot glue gun.

I also made some little crowns that I had spotted on one of many late nights surfing the net and these were dead easy. All you need is some toilet rolls (empty ones of course) some scissors and some paint. I just cut the rolls in half and cut triangles all around them to make the crown shape and of course the paint was white and pink!


A great online shop I found for some lovely little things was "Little Big Company"......I bought this gorgeous drink dispenser along with these cute little milk bottles! I filled the dispenser with pink lemonade but you can just about put anything you like in it.


The beautiful coloured straws were of course bought from the "Donna Hay" store (I know I have a slight obsession with anything DH) but you can just about get any coloured straws from most online party shops.  Another great shop for some little things was a place called "The Party Parlour".
I had both paper cups along with the little glass milk bottles (I'm not sure if the novelty for the little bottles was more for me or the kids.....what on earth was I thinking with 12 six year olds and glass bottles!!)


I was able to find some lanterns just at my local post office in the throw out box so I was very excited to see pink ones there. I just bought some cheap ribbons at my local material shop and hung them from some wire and attached these gorgeous little butterflies that I found just at Crazy Clarks......a $2 shop here in Oz for all my overseas friends who take the time and follow M & B.

I have done a couple of recipes that were done on the day in previous blogs, like cupcakes and those yummy jam butterflies. We also had some little ham and cheese sandwiches that were cut out with a circle cutter and I attached a cherry tomato to some to make them look like a flower.


All in all it was a great morning and I really had the best time putting it all together but I have told Miss 6 her next party will be when she turns 18. Of course she just rolls her eyes at me and secretly deep down I know I won't be able to help myself.......until the next party!

I think B might have the next party....wink wink!

M x

Thursday, 30 August 2012

Rainbow sprinkle cake

I was looking back on the special occasion cakes that I have made for my little darlings and I'd have to say this one was extra special. Not because it was for one of my babies but because it was the biggest cake that I have actually made and for a cake with no egg yolks, it was so light and moist and I thought it tasted great. Like my obsession for chocolate I seem to have a slight thing for butterflies! (One of the other birthday cakes I have posted, also had butterflies on it but they were edible).

This cake definitely has the "wow" factor look about it and the beauty of it is you could just opt for two layers if you were just that little bit scared about dealing with the height of the cake (Betty, I know you would love one this high for your little man......maybe with some kind of owl on it perhaps?).

I found the directions very easy to follow and the actual baking of the cake was so simple. Probably the hardest part of the cake was the icing part and blending the two colours just so it has that ombre effect (the latest craze sweeping across the universe of cake land - meaning shades of colours descending from either light into dark shades or vice versa).

This recipe was found in Donna Hay's latest kids issue and just so happened to co-ordinate perfectly with my Miss 5 turning 6's ballerina/fairy themed party! Let's just say there was A LOT of PINK. I will en devour to post some pictures of my efforts and hopefully you might see some ideas for your next party!


You will need:     cake mixture
2 cups (500ml) milk, at room temperature
12 eggwhites
2 teaspoons vanilla extract
4 1/2 cups (675g) plain (all-purpose) flour, sifted
2 tablespoons baking powder, sifted
3 1/2 cups (770g) caster sugar (superfine)
340g butter, softened
1/3 cup coloured sprinkles
cream cheese icing
150g butter, softened
750g cream cheese, softened
3 cups (480g) icing sugar mixture, sifted
pink food colouring

Preheat your oven to 175 degrees (345F). Divide the ingredients for the cake mixture into 2 equal batches. (I guess this is where you can decide if you would rather just make half instead of the whole mixture).
To make the first batch, place the milk, eggwhites and vanilla in a bowl and lightly whisk to combine. Set aside. (Make sure you read the recipe as it states the milk to be at room temperature)


Place the flour, baking powder and sugar in an electric mixer and mix on low speed until combined. Add the butter and beat until mixture resembles fine, moist crumbs.


Increase speed to medium and gradually add the milk mixture, beating for 2 minutes or until just combined.


Divide half the first batch of cake mixture between 2 x 20cm-round lightly greased cake tins lined with non-stick baking paper, reserving the remaining mixture.


Sprinkle each cake with 1 tablespoon coloured sprinkles and spoon over the remaining mixture. (Now this is where I made the mistake and didn't read the recipe correctly......yes I know B your rolling your eyes. I just sprinkled the 100's of 1000's just on top of the cake mixture instead of in between, so my pictures will show the sprinkles sitting on top of the final baked cake).


Bake for 35-37 minutes or until cooked when tested with a skewer. Allow cakes to cool in the tins for 10 minutes before turning out onto wire racks to cool completely.


To make the second batch, repeat the method above using the remaining cake mixture ingredients.


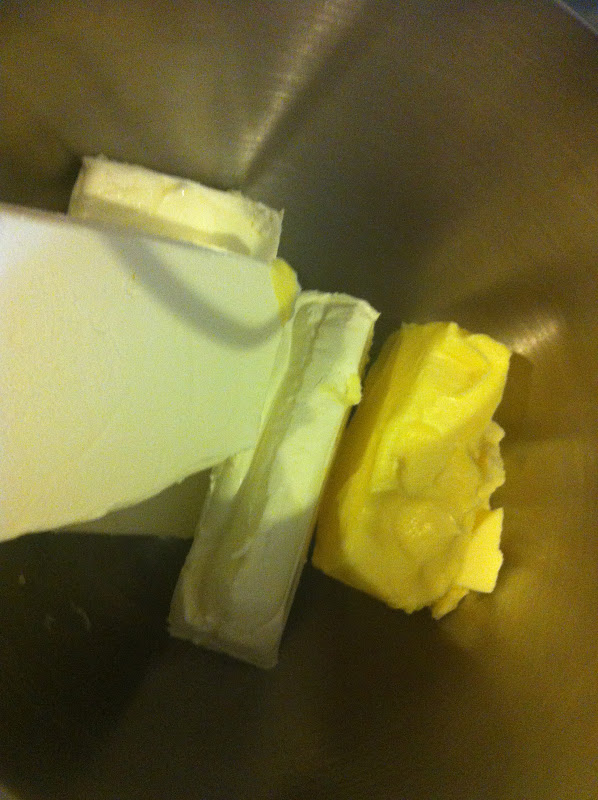
To make the cream cheese icing, place the butter and cheese in an electric mixer and beat for 6-8 minutes or until pale and creamy.


Add the icing sugar and beat for a further 6-8 minutes or until pale and fluffy.


Divide the icing into two bowls. Add a few drops of pink food colouring to one bowl and stir to combine.


To assemble the cake, trim the tops from the four cakes and discard. Layer each cake with 3/4 cup white icing to create 1 x 4-layer cake.


Using a palette knife, ice the bottom half of the cake with the white icing. Run a palette knife around the sides of the cake to blur the icing. Refrigerate for 30 minutes or until icing is just set.


Decorate with your butterflies.


I really enjoyed putting this cake together! Enjoy M x

Tuesday, 14 August 2012

Butterfly jam tarts

August is a birthday bonanza at our house and I wanted to share a few different things I made for Miss 6's official party, though you don't need a party to make these beautiful jam tarts! You could also make any shape really - butterflies, fairies and ballerinas featured at this party so the butterfly was a perfect fit. These were a great hit with adults so maybe I don't really need a party for an excuse after all!!!

I had a butterfly cookie cutter and some tiny love heart shaped ones which is what was asked for in this recipe but I don't think my actual butterfly was the exact size that was recommended as I was only able to cut 2 love hearts instead of the required 4 but it still worked fine. I found them easy to make and I loved how the jam mixture, even though exposed through the cut out hearts, didn't ooze out all over the shortcrust pastry and it held it's shape. It really was a novel idea that I spotted in the latest Donna Hay Kids issue and just had to try of course. Who doesn't like eating jam tarts off a stick!


You will need:
1/2 cup (65g) sweetened dried cranberries
1/4 cup (80g) raspberry jam
1 tablespoon caster sugar
4 sheets store-bought shortcrust pastry, thawed
1 egg, lightly beaten
18 wooden sticks (paddle pop sticks I used)
white sugar, for sprinkling

Preheat oven to 180 degrees. Place the cranberries, jam and sugar in a small food processor and process until a rough paste forms.


 Using a 5cm x 7cm butterfly-shaped cookie cutter, cut 36 shapes from the pastry. Using a 1cm x 1.5cm heart shaped cookie cutter, cut 4 heart shapes or 2 like I have above from half the butterflies. Place the whole butterflies on lightly greased baking trays lined with non-stick baking paper. Spoon 1 teaspoon of the jam mixture into the centre of each whole butterfly and brush the edges with egg. Lightly press a wooden stick onto the base of each butterfly and top with the remaining butterfly shapes.


 Press the edges to seal, brush with egg, and sprinkle with white sugar. Bake for 15-17 minutes or until light and golden. Allow to cool on the trays before serving.


Enjoy! Mx