Showing posts with label cream cheese. Show all posts

Thursday, 30 August 2012

Rainbow sprinkle cake

I was looking back on the special occasion cakes that I have made for my little darlings and I'd have to say this one was extra special. Not because it was for one of my babies but because it was the biggest cake that I have actually made and for a cake with no egg yolks, it was so light and moist and I thought it tasted great. Like my obsession for chocolate I seem to have a slight thing for butterflies! (One of the other birthday cakes I have posted, also had butterflies on it but they were edible).

This cake definitely has the "wow" factor look about it and the beauty of it is you could just opt for two layers if you were just that little bit scared about dealing with the height of the cake (Betty, I know you would love one this high for your little man......maybe with some kind of owl on it perhaps?).

I found the directions very easy to follow and the actual baking of the cake was so simple. Probably the hardest part of the cake was the icing part and blending the two colours just so it has that ombre effect (the latest craze sweeping across the universe of cake land - meaning shades of colours descending from either light into dark shades or vice versa).

This recipe was found in Donna Hay's latest kids issue and just so happened to co-ordinate perfectly with my Miss 5 turning 6's ballerina/fairy themed party! Let's just say there was A LOT of PINK. I will en devour to post some pictures of my efforts and hopefully you might see some ideas for your next party!


You will need:     cake mixture
2 cups (500ml) milk, at room temperature
12 eggwhites
2 teaspoons vanilla extract
4 1/2 cups (675g) plain (all-purpose) flour, sifted
2 tablespoons baking powder, sifted
3 1/2 cups (770g) caster sugar (superfine)
340g butter, softened
1/3 cup coloured sprinkles
cream cheese icing
150g butter, softened
750g cream cheese, softened
3 cups (480g) icing sugar mixture, sifted
pink food colouring

Preheat your oven to 175 degrees (345F). Divide the ingredients for the cake mixture into 2 equal batches. (I guess this is where you can decide if you would rather just make half instead of the whole mixture).
To make the first batch, place the milk, eggwhites and vanilla in a bowl and lightly whisk to combine. Set aside. (Make sure you read the recipe as it states the milk to be at room temperature)


Place the flour, baking powder and sugar in an electric mixer and mix on low speed until combined. Add the butter and beat until mixture resembles fine, moist crumbs.


Increase speed to medium and gradually add the milk mixture, beating for 2 minutes or until just combined.


Divide half the first batch of cake mixture between 2 x 20cm-round lightly greased cake tins lined with non-stick baking paper, reserving the remaining mixture.


Sprinkle each cake with 1 tablespoon coloured sprinkles and spoon over the remaining mixture. (Now this is where I made the mistake and didn't read the recipe correctly......yes I know B your rolling your eyes. I just sprinkled the 100's of 1000's just on top of the cake mixture instead of in between, so my pictures will show the sprinkles sitting on top of the final baked cake).


Bake for 35-37 minutes or until cooked when tested with a skewer. Allow cakes to cool in the tins for 10 minutes before turning out onto wire racks to cool completely.


To make the second batch, repeat the method above using the remaining cake mixture ingredients.


To make the cream cheese icing, place the butter and cheese in an electric mixer and beat for 6-8 minutes or until pale and creamy.

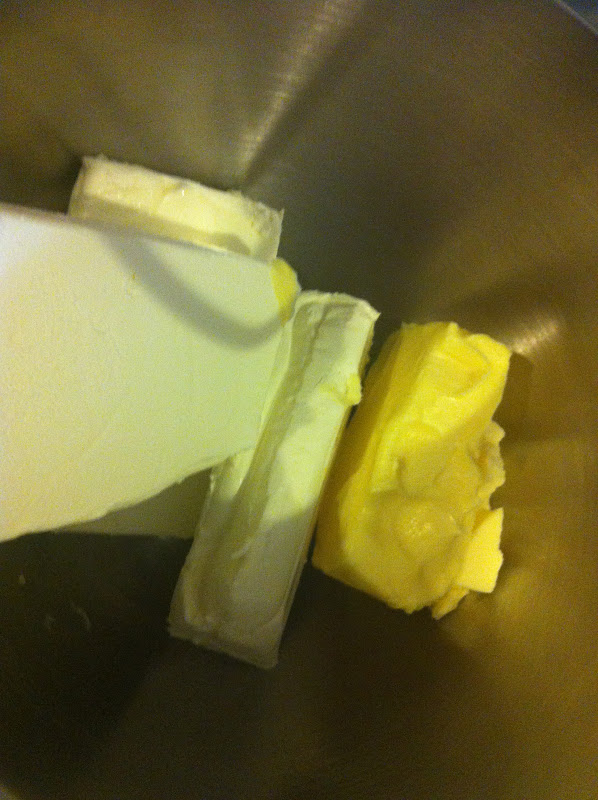

Add the icing sugar and beat for a further 6-8 minutes or until pale and fluffy.


Divide the icing into two bowls. Add a few drops of pink food colouring to one bowl and stir to combine.


To assemble the cake, trim the tops from the four cakes and discard. Layer each cake with 3/4 cup white icing to create 1 x 4-layer cake.


Using a palette knife, ice the bottom half of the cake with the white icing. Run a palette knife around the sides of the cake to blur the icing. Refrigerate for 30 minutes or until icing is just set.


Decorate with your butterflies.


I really enjoyed putting this cake together! Enjoy M x

Saturday, 2 June 2012

Velvet Cupcakes

This one is for all the Mum's, Mum's-to-be and those who love their Mum out there (Hi Mum - B & I love you!). B has entered the Mum's club and celebrated her first official Mother's Day this year. Soon B will experience all the beautiful little homemade cards and gifts that baby B will bring home from school hidden in the bottom of his school bag (well when he starts school that is) but for now I'm sure she enjoyed getting pampered and maybe having a sleep in. This could be a regular gig hey Mr B? (hint hint).

As everyone says, until you become a mother yourself, words can't explain the amount of love that you have for your little people and that protective instinct that kicks in from late in pregnancy. It's an amazing feeling and I now understand my own mum and the way she is always putting herself last on the list. She is a very strong woman and I hope to instill all the strengths and values she has taught me into my own children. Thanks Mum!

We usually gather at Mum's place on Mother's Day or we sometimes head out for a picnic depending on the weather and even though it's "OUR" day I still bake because we all know Mr M is not exactly skilled in this department. Lets just say a pair of tongs in his hand is better suited and as for Mr B, he can produce an edible dish now and then under instruction, but now that baby B has arrived, he will have duties of his own. I think I may have more hope with my own Mr 8 being able to master the kitchen and we will work on baby B from the moment he can hold his spoon!!

So the Mother's Day picnic usually requires making simple things to eat straight from the picnic basket and I always seem to be allocated a sweet thing, so I was desperate to try these Velvet Cakes that I had spotted in Jamie's America ages ago. I had never made a red velvet cake before and wanted to know what all the fuss was about. It certainly has a dramatic colour and is so soft and fluffy (I had to eat one before I even iced them) and there was the hint of chocolate with the cocoa.


You will need:  - makes 12 cupcakes
50g unsalted butter, at room temperature
150g caster sugar
1 large egg
sea salt
1 teaspoon good-quality vanilla extract
optional: 3 tablespoons natural red food colouring - I used normal red food colouring
2 heaped tablespoons cocoa powder
150g plain flour
125ml buttermilk
1/2 teaspoon bicarbonate of soda
1 1/2 teaspoons white wine vinegar

For the frosting:
150g full-fat cream cheese
50g unsalted butter, at room temperature
100g icing sugar
1/2 teaspoon vanilla extract
zest and juice of 1 lemon

Preheat oven to 180 degrees/350 F/gas 4 and line a 12 hole muffin tin with cupcake cases.


Using an electric mixer, or by hand, cream your butter and sugar together until light and fluffy.


Gently beat in the egg, a pinch of salt, the vanilla extract and, if using, the red food colouring.


In a separate bowl, mix together the cocoa and plain flour and fold half of it into your batter mix, followed by half of the buttermilk. Repeat with the remaining flour and buttermilk until you have a gorgeous smooth mixture.


In a small bowl mix your bicarbonate of soda and white wine vinegar together so it fizzes up, and stir this into your cake mix.


Divide the mixture between your cupcake cases and bake in the oven for 20 to 25 minutes.
I learnt a new trick when making cupcakes....if your like me and your cupcakes usually come out of the oven spilling over the edges, flat on some, not enough in others, well I found this very useful tip in one of my Donna Hay books. For a nice rounded cupcake spoon your mixture into 1/3 measuring cup for each patty case as this will ensure each cake will be nice and even.


To check they are cooked through, insert a skewer into the centre of a cake - if it comes out clean, they are perfect. Leave them cool for 5 minutes in the tin, then transfer to a wire rack to cool completely while you make the frosting.


Frosting
Put all your ingredients into a food processor (I just used my cake mixer for this) and whiz until smooth and creamy.


Once the cakes are cool they are ready for the frosting.


Yum! M x