Showing posts with label white chocolate. Show all posts

Friday, 28 September 2012

Baby Shower Cupcakes

Betty was on assignment. Well, in actual fact she gave me the assignment as she was invited to a baby shower for one of her best friends. I was to make cupcakes and had free range of what I could do and because the mother-to-be already knew her baby was a gorgeous little boy I decided I wanted the colour blue to appear somewhere, but where? Cupcake wrappers, icing or blue sprinkles perhaps? I did do a little research and there were so many great ideas out there and very clever ones I might add, whilst the flavour of the cupcakes were thought up by Betty.

The first was a caramel mud cake with a simple butter cream icing and the second one was to be a lemon one with some lemon curd put inside the actual cupcake itself. You will find the lemon cupcake recipe on our blog under "Lemon Meringue Cupcakes" but I didn't put the meringue on top of these particular cupcakes. A simple lemon cream cheese icing with a touch of yellow coloring to give it the coloured look I was after.


Caramel Mud Cake
125g butter, chopped coarsely
100g white eating chocolate, chopped coarsely
2/3 cup firmly packed light brown sugar
1/4 cup golden syrup
2/3 cup milk
1 cup plain flour
1/3 cup self-raising flour
1 egg
Butter cream
90g butter softened
1 cup icing sugar
1 tablespoon milk

Preheat oven to 170 degrees/340F. Line 12 hole muffin pan with paper cases.


Stir butter, chocolate, sugar, syrup and milk in small saucepan over low heat until smooth. Transfer mixture to medium bowl, cool 15 minutes.


Whisk sifted flours into chocolate mixture, then whisk in egg. Drop 1/4 cups of mixture into paper cases. Bake about 30 minutes. Stand cakes in pan 5 minutes before turning top-side up, onto wire rack to cool.

For the butter cream, beat butter in small bowl with electric mixer until as white as possible, beat in sifted icing sugar and milk, in two batches. (You can tint the icing with any colour you like).

For the decorations on top of this particular cupcake I made little blue rattles.


For the end of the rattle it was a little white chocolate called a Raffaello and the stick part was a packet of cake pop sticks that I cut to size. I then wrapped ribbon around each stick and used my hot glue gun so the ribbon didn't unwind.


For the Lemon cupcake I tinted the icing with a touch of yellow and used some persian fairy floss for the tops of each cake.


Persian fairy floss comes in a variety of different flavours and it's best arranged on your cupcake just before serving them.


Enjoy! M x

Sunday, 17 June 2012

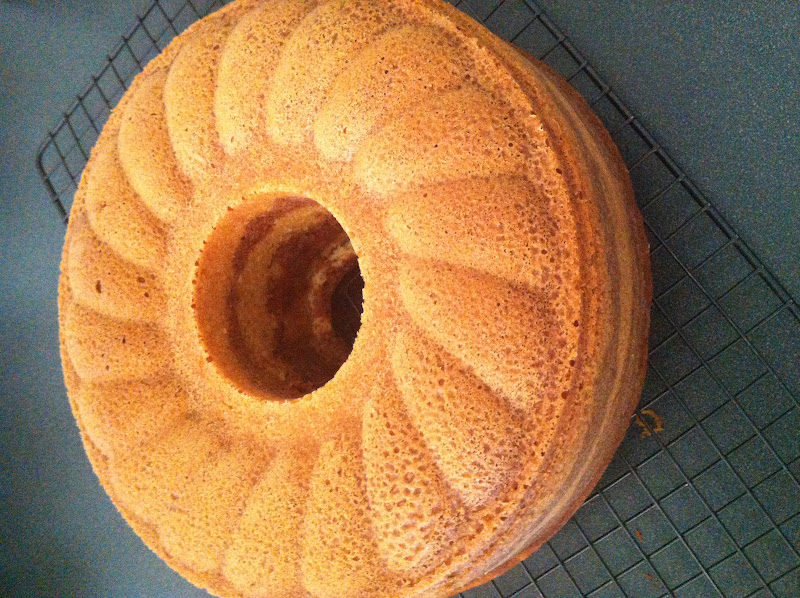
White and dark chocolate jaffa swirl cake

My first recollection of chocolate and orange flavour as a combination was when I would go to the cinema to watch a movie. Of course buying popcorn rated highly on top of my list but also buying a box of Jaffa's (I'm sure I remember buying Jaffas in a box....does anyone remember that? Oh and for those overseas readers, Jaffa's are crunchy orange-flavoured candy coated balls of chocolate). I certainly wasn't one of those kids that would waste their little balls of yumminess by rolling them down the aisle and wasn't an angsty teenager throwing them at some poor persons head!! I was too busy eating them (story of my life?!). But I do remember on the odd occasion that I may have lost half a packet or box at the excitement of trying to open them so quickly.

I'm sure everyone has their own way of eating a Jaffa. For me its sucking the outer shell until the orange colour has totally disappeared and then the hard exterior begins to become soft and it may break and the burst of chocolate finally appears on those taste-buds making the chocolate all soft and gooey.....YUM!!! So I think my obsession for the combination of chocolate and orange flavoured cakes may have begun way back in these Jaffa days and this cake from my Belinda Jeffery "Mix & Bake" bible is gorgeous.

In this recipe Belinda uses the food processor to make the batter of the cake and I started that way until I was up to the part of adding the flours back into the egg, milk and butter mixture and found my processor not big enough to hold the entire mixture so I ended up tipping it all into a big bowl and folding the flours through which still worked out fine. So if you don't have a large processor I would suggest just using your normal electric cake mixer.


You will need:
55g good-quality white chocolate, chopped
55g good-quality dark chocolate, chopped
290g unsalted butter, chopped, at room temperature
2 1/2 cups (375g) plain flour
1 teaspoon baking powder
3/4 teaspoon bicarbonate soda
1/2 teaspoon salt
4 eggs
2 cups (400g) caster sugar
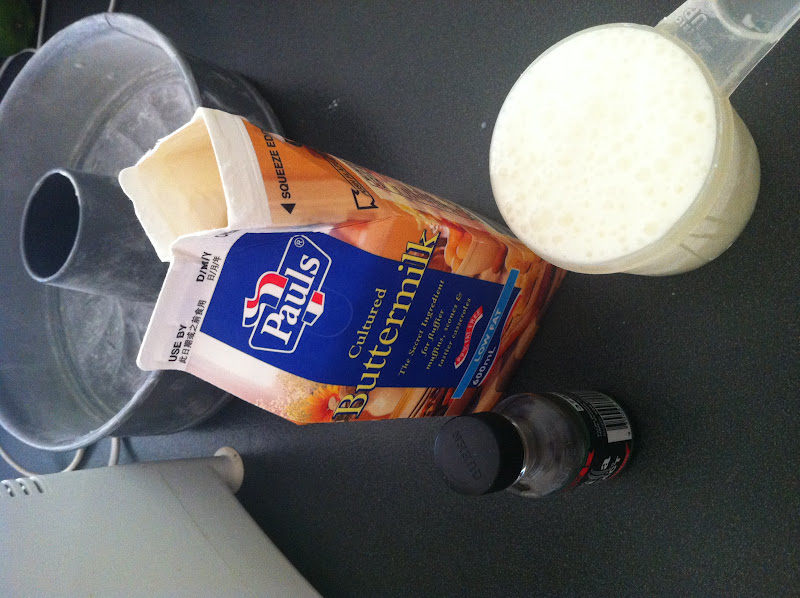
1 cup (250ml) buttermilk
1 1/2 teaspoon vanilla extract
3 teaspoons finely grated orange zest
Ganache for the top

Preheat your oven to 180 degrees. Butter and flour a bundt tin, these tins are just like a round tin but with fluting and by rubbing butter and then dusting flour onto it this will ensure your cake will come out without sticking to the tin. I do this method with all my tins, even the ones where I can line it with baking paper.


Put the white chocolate into a small microwave-proof bowl, then tip the dark chocolate into another. Put 20g of the butter into each of the 2 bowls. Microwave the white chocolate and butter on high for about 35-40 seconds or until melted, stopping to stir it halfway through.


Remove it from the microwave and stir it again to make it as smooth as possible. Repeat this process with the dark chocolate mixture. Leave both bowls of chocolate to cool to room temperature.


Put the flour, baking powder, bicarbonate of soda and salt into a food processor. Whiz them together so they're well mixed, then tip them into a bowl.


Put the eggs and sugar into the processor and whiz them for 1 minute. Add the remaining butter chunks to the egg mixture and process everything for another minute. Pour in the buttermilk and vanilla extract and whiz together for about 10 seconds to mix them in.


Tip the flour mixture and blend it in with a few quick pulses so the batter is just combined. Remember to scrape stop and scrape down the sides at least once.
Transfer half the batter to a bowl, then stir in the dark chocolate mixture.


Add the white chocolate mixture and orange zest to the remaining batter. Blend it in so it's just combined.


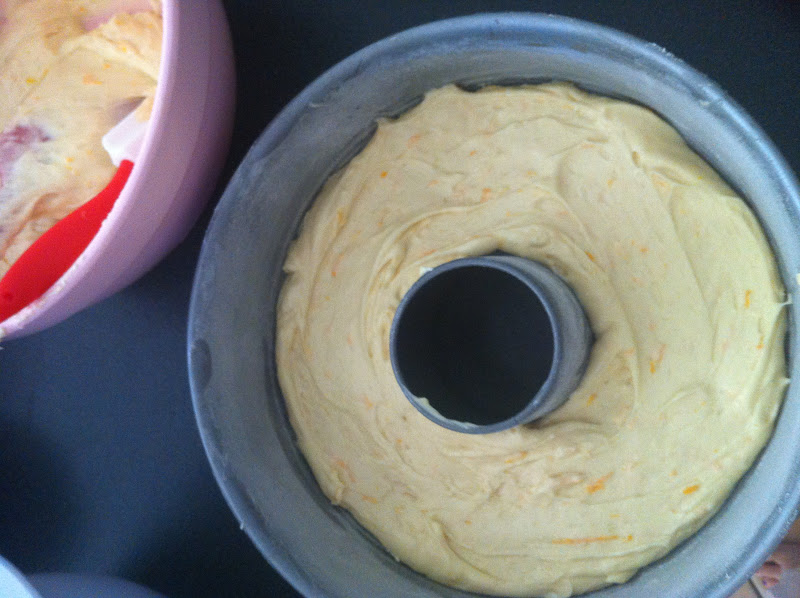
Spread half the white chocolate batter into the bottom of the bundt tin to form an even layer.


Dollop half the dark chocolate batter on top and spread it out as evenly as you can.


Repeat this layering with the remaining batters. Run  a narrow knife blade right through the batter, moving it around the central tube in a petal or figure-of-eight pattern as you go (this swirls the two mixtures together, be careful not to get too carried away or they will just blend together).


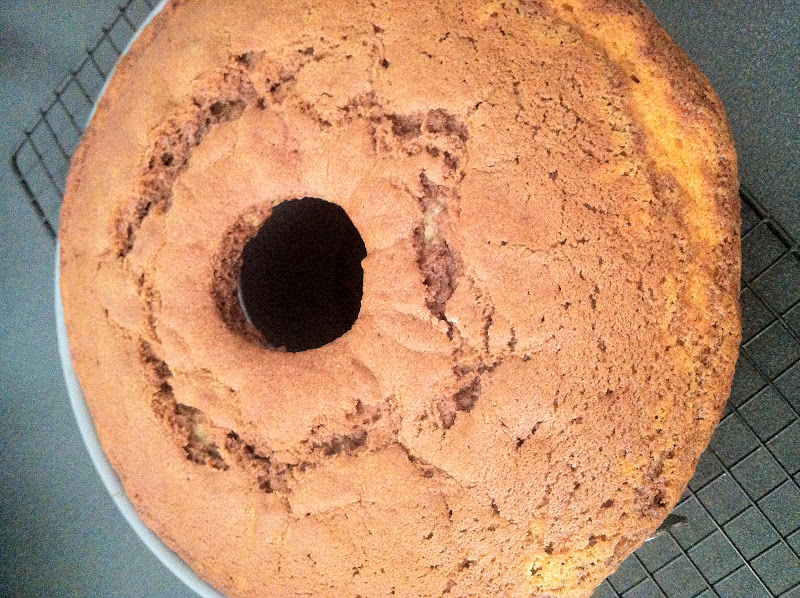
Bake for  about 55 minutes or until a fine skewer inserted in the middle of the cake comes out clean. Cool the cake in the tin on a wire rack for 10 minutes. Carefully loosen the edges of the cake and invert it onto the rack. Leave it to cool completely.


This cake has a Chocolate ganache over it but you could put any form of chocolate icing even a white chocolate icing. I will give you the recipe that I used from Belinda's book.

Ganache (shiny chocolate icing) - I used half of what is listed below
250g good quality dark chocolate, cut into small chunks
125g unsalted butter, cut into chunks

Put the chocolate, butter into a medium-sized, heavy-based saucepan over low heat. Let the chocolate and butter melt, stirring the mixture frequently, until ganache is smooth. The most important thing to keep in mind when making your ganache is not to let the mixture get too hot. Once it's silky smooth , take it off the heat. let it cool until it's barely warm and of a thick pouring consistency before using it.


YUM! M x

Thursday, 29 March 2012

Raspberry-layered butterfly cake


I have mentioned before how B & I love making special birthday cakes for family and we have shared with you a couple of our creations so far along the way. I made this beautiful cake for my gorgeous girls to share on their birthday. I usually try to make them a cake each but seeing as Miss 4 turning 5 didn't seem to object to sharing this event with her big sister this year (don't think I can get away with it for much longer!), I decided to opt for the one special cake. I didn't exactly time their Birthdays very well did I? Having them one day apart from each other with nothing that exciting going on 9 mths before hand that I can think of!

I wanted the 'WOW!' factor from their little faces and oh how I loved looking through all the kids cake books to find something that my girls would love. I sometimes think how lucky I am to have some little people to make my creations for or else I'd end up making them for my parents and at their 'mature' age, getting the Woman's Weekly swimming pool cake might look a little odd!!

You might think this cake looks really hard but trust me not only did it look the part it tasted great and was actually very easy, all you need to do is just follow the instructions closely.

Now I know what B is going to say "Not another kids cake book", but she will thank me once her little bub is born and she will be begging me to borrow my collection trust me! I have a confession to make, yes I found this cake in yet another book I bought (I just HAD to have it). It's another Women's Weekly called "More Cakes For Kids".


Equipment
two deep 17cm round cake pans
20cm round prepared cake board or plate
oven tray
small piping bag ( I just used a glad sandwich bag that I just cut the tip off )

White Chocolate Cake
185g  white eating chocolate, chopped coarsely
90g unsalted butter, chopped coarsely
1 cup buttermilk
1 1/4 cups caster sugar
3 eggs
1 teaspoon vanilla extract
1 cup plain flour
1/2 cup self-raising flour
1/2 teaspoon bicarbonate of soda
2 Quantities fluffy mock cream frosting (which I will show you further down the page)
1/4 cup raspberry jam, warmed, strained, cooled
pink food colouring

Decorations
125g white chocolate melts, melted

1.Preheat oven to 150 degrees. Grease pans, line with baking paper.
2.Stir chocolate, butter and buttermilk in a medium saucepan over low heat until smooth, cool 10 minutes.
3 Whisk sugar, eggs and extract into chocolate mixture. Whisk in sifted dry ingredients until mixture is smooth and glossy.
4. Divide mixture between pans, bake about 1 hour. Stand cakes in pans for 5 minutes, turn top-side up. onto wire racks to cool.

For the butterflies
Using the letter B shape ( like half a butterfly wing shape) trace them onto some baking paper. I used 3 different sizes, a large, medium and small for my butterflies.
Tint the melted chocolate buds pink , spoon into a piping bag (this is where I used a glad sandwich bag and just cut the corner tip ever so slightly).


Pipe chocolate around the inside butterfly shapes on the tray, stand at room temperature until set.

Fluffy mock cream frosting (you will need two quantities of this)
2 tablespoons milk
1/3 cup water
1 cup caster sugar
1 teaspoon gelatine
2 tablespoons water, extra
250g unsalted butter, softened
1 teaspoon vanilla extract

Combine milk, the water and sugar in small saucepan, stir syrup over low heat, without boiling, until sugar is dissolved.

Sprinkle gelatine over the extra water in a cup, add to pan, stir syrup until gelatine is dissolved. Cool to room temperature. Beat butter and extract in a small bowl with electric mixer until it is as white as possible. While motor is operating, gradually pour in cold syrup, in a thin steady stream, beat until light and fluffy. Mixture will thicken more on standing.
Remove half the fluffy mock cream frosting to a medium bowl, stir in jam, tint pink.
Split cold cakes in half, sandwich cakes with raspberry pink frosting on cake board. Spread cake all over with remaining plain frosting. Position butterflies on cake and decorate with a ribbon.


So beautiful and watching my girls faces was all worth the effort!

Enjoy! M x